How to Create Images for Cricut: Quick and Easy Guide
If you are a regular Cricut user, you know how important the Design Space app is for your DIY projects. One of its key features is the ability to create your own images. To use this feature, you need to know how to create images for Cricut.
If you do not know how to make
images in the Cricut software, don’t worry! This guide will cover everything
you need to know to create your own images in Design Space. You will find 8
simple steps to follow, but first, I am going to explain how to prepare for the
process.
Get Ready for Making Your Own Images in Cricut Design Space
Before you learn how to create images for Cricut, you
should know what you have to do before making images. You can create images on
the app, and to use the app on your operating system, you will need to do
certain things.
You will need to
download the software to your mobile phone or computer. It is the Cricut app
that allows you to create images for your DIY projects. After downloading the
app, you will need to log in with your account because Cricut needs an account
for operating your Cricut machines. After creating your Cricut ID, you can now
start the process of making images in the Design Space.
How to Create Images for Cricut: 8 Simple Steps
To make an image in your software,
you will have to follow some basic steps. I am going to write down all of them
one by one, and you can easily create images following them.
Step 1: Open Design Space on Your Device

To start creating images, open the
Design Space and click on the New
Project section. A blank canvas will appear on the screen. You can either
upload a ready-made PNG file or start creating your own. For this project, a
Free Sunflower SVG from the Design Bundles will be used.
Step 2: Upload Your Image on Canvas
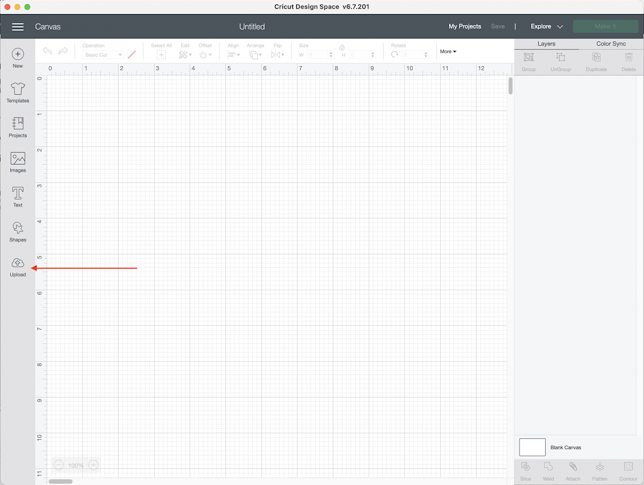
Once you have opened the canvas,
you have to upload the image. You should click on Upload to start uploading the image and select it from your
computer. Later, you will turn the image into multiple layers. After uploading
the image, you will need to select the Complex
option, and then you have to click on the Continue button.

Step 3: Use the Magic Wand Tool to Separate Image
In order to learn how to create images for Cricut, you
have to use the Magic Wand tool afterward. This tool will help you click on the
individual pieces of the image after splitting it into different layers and
then remove them. You can keep one color at once. As you can see in the image,
you can click any portion and then remove it.

Step 4: Select the Cut Image Option
Now, you will have to select the Cut Image option. After that, you have
to upload the image again.

Step 5: Upload the File Again
You will have to upload the image
again. To do this, you must select the Upload
Image button from the files again. After that, select Complex and hit Continue again.

Steps 3-5 need to be done
repeatedly until all the colors you want are saved in separate layered cut file
images.
Step 6: Insert All the Images
Now that you have all the images
separated into multiple layers, you can insert them by clicking on each file.
This will bring all the layers into your beautiful project.

Next, all the images are in the
software. If some files appear to be very large, you will have to scale them
down. A change in height and width will help.
Step 7: Change the Color of Each Layer
You can change the color of the
layers if you want. However, this is very optional and depends on you whether
you want it or not. To change color, select a layer, go to the operation menu, and click on the black
square. From there, select the color you wish. Repeat the process for each
layer.

Step 8: Click on the Make It Button
Finally, you can cut each layer
individually on a separate mat. It allows you to cut all the different colored
pieces on various materials. You just have to put the cardstock or vinyl on a
cutting mat and cut it on the image.

Conclusion
You read the whole blog, and now
you know how to create images for Cricut.
It is an excellent thing that you can do in the Design Space app. By creating
images, you can craft beautiful projects. To do this, you will need a device
and the software on it. You can follow all the steps that I have written above
in this post one by one. Once you are done with that, you can cut all those
newly created images on your machine individually on different colored
materials, and a beautiful image will be created.
FAQs
Is It Possible to Create My Own Images?
Yes, for sure! The Design Space
app offers multiple options for creating designs. You can either pick any
design or upload it from your device. To create your own image on the app, you
will have to upload an image, and then the app will convert it into many shapes
that you can cut however you want, creating a completely new design.
How Can I Find Images in Cricut Design Space?
The app has thousands of
ready-made images. You can pick any of them and customize them however you
like. Here is how you will find those images
- First,
open the Design Space app.
- After
that, select the My Stuff
option.
- Next,
you have to select the Free
Projects option.
- Now,
choose free images and then select images.
- Choose
purchased, and it will show you the available images for the app.
How Can I Upload an Image to Cricut Design Space?
These are the simple steps to
upload an image on the Cricut Design app.
- First,
visit the app and go to the New
Project section.
- Then,
find the Upload button on the
app and click on it.
- Now,
select an image of your choice. You can use the various eraser tools to
remove the background of the image.
- Finally,
give the image a name and click on Upload
to complete the process.
Source URL: - How to Create Images for Cricut


Comments
Post a Comment